Frequently Asked Questions#
Installing and updating#
Q: How do I install Spyder?
The easiest way to install Spyder is with the Anaconda Python distribution, which comes with everything you need to get started in an all-in-one package. Download it from its webpage.
For more information, visit our Install Guide.
Q: How do I install Spyder on Windows Subsystem for Linux 2 (WSL2)?
If you already installed Spyder on your Windows machine, you do not need to reinstall it on a WSL2-based Linux environment if your code must run there.
Instead, just install Miniconda inside WSL2 and create a new conda environment (or use an existing conda- or virtualenv), then install Spyder-Kernels into that environment with e.g. conda install spyder-kernels.
You must manually install ipython_genutils with e.g. conda install ipython_genutils.
Note
Windows creates a network path located at \\wsl$ that points to the partitions of your WSL2 machines, e.g. \\wsl$\Ubuntu-20.04.
You must map a network drive letter to your machine path, e.g. W:, for Spyder to correctly see its files and folders.
To start a Spyder kernel, from your Linux terminal run
python -m spyder_kernels.console --matplotlib="inline" --ip=127.0.0.1 -f=~/remotemachine.json &
It will run the kernel as a subprocess and create a file named remotemachine.json in your WSL home folder.
Finally, under the options menu of Spyder’s IPython Console, select Connect to an existing kernel as described in Using external kernels.
Insert the absolute path of remotemachine.json into the Connection file field.
If you mapped W: as mentioned in above note, the path should be W:/home/username/remotemachine.json.
A new console will open in Spyder, running in the Linux environment.
Try running os.system('ls -la') and see if it lists your WSL home folder.
If you run exit() from Spyder, the kernel running on Linux will be stopped.
Q: How do I update Spyder using conda?
From the command line (or Anaconda prompt on Windows), run:
conda update anaconda
conda update spyder
If this results in an error or does not update Spyder to the latest version, try:
conda install spyder=5
Running Spyder#
Q: How do I run Spyder?
You can launch it in any of the following ways:
From the command line: Type
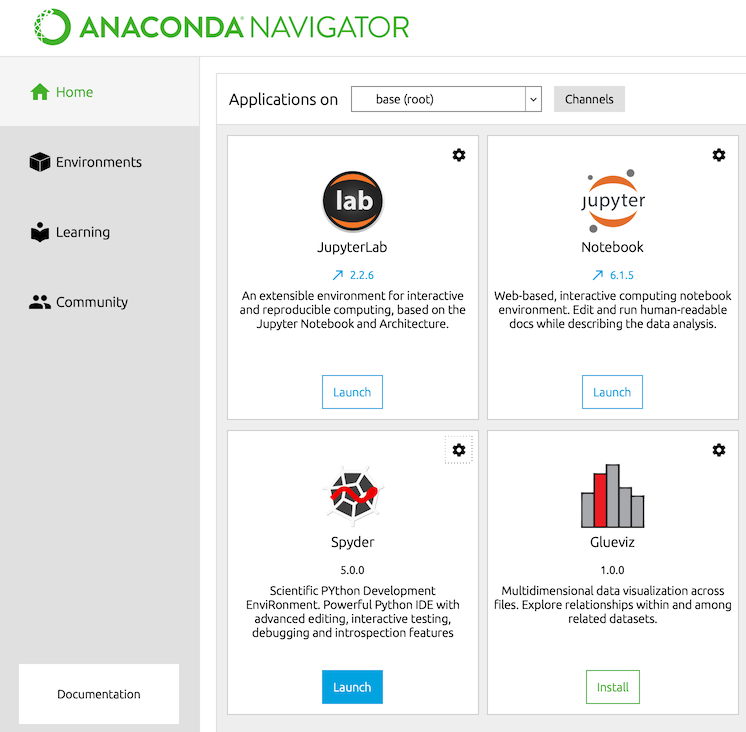
spyderin your terminal (or Anaconda prompt on Windows).From Anaconda Navigator: Scroll to Spyder under Home, and click Launch.
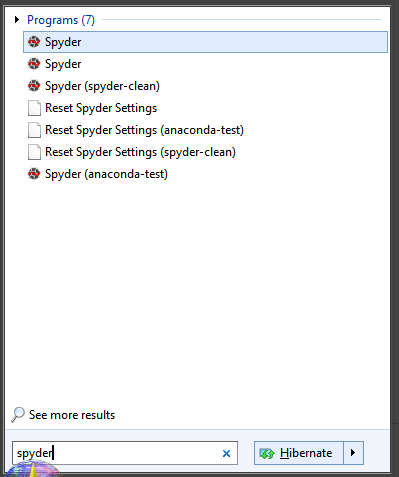
*Windows Only*: Launch it via the Start menu shortcut.
Q: Can I try Spyder without installing it?
Q: What are the system requirements for Spyder? How resource-intensive is it?
Spyder works on modern versions of Windows, macOS and Linux (see the table below for recommended versions) via Anaconda, as well as other methods. It typically uses relatively minimal CPU when idle, and 0.5 GB - 1 GB of RAM, depending on how long you’ve been using it and how many files, projects, panes and consoles you have open. It should work on any system with a dual-core or better x64 processor and at least 4 GB of RAM, although 8 GB is strongly recommended for best performance when running other applications. However, the code you run, such as scientific computation and deep learning models, may require additional resources beyond this baseline for Spyder itself.
Operating system |
Version |
|---|---|
Windows |
Windows 8.1 |
macOS |
High Sierra (10.13) |
Linux |
Ubuntu 16.04 |
Q: How do I run Spyder installed in a conda environment using the command line?
Activate your conda environment by typing the following in your terminal (or Anaconda Prompt on Windows):
conda activate <ENVIRONMENT-NAME>
Then, type spyder to launch the version installed in that environment.
Using Spyder#
Q: How do I install Python packages to use within Spyder if I installed Spyder with conda?
The first approach for installing a package should be using conda. In your system terminal (or Anaconda Prompt on Windows), type:
conda install <PACKAGE-NAME>
If your installation is not successful, follow steps 3 through 5 of Part 2 in our video on solving and avoiding problems with pip, Conda and Conda-Forge.
Q: How do I get Spyder to work with my existing Python packages/environment?
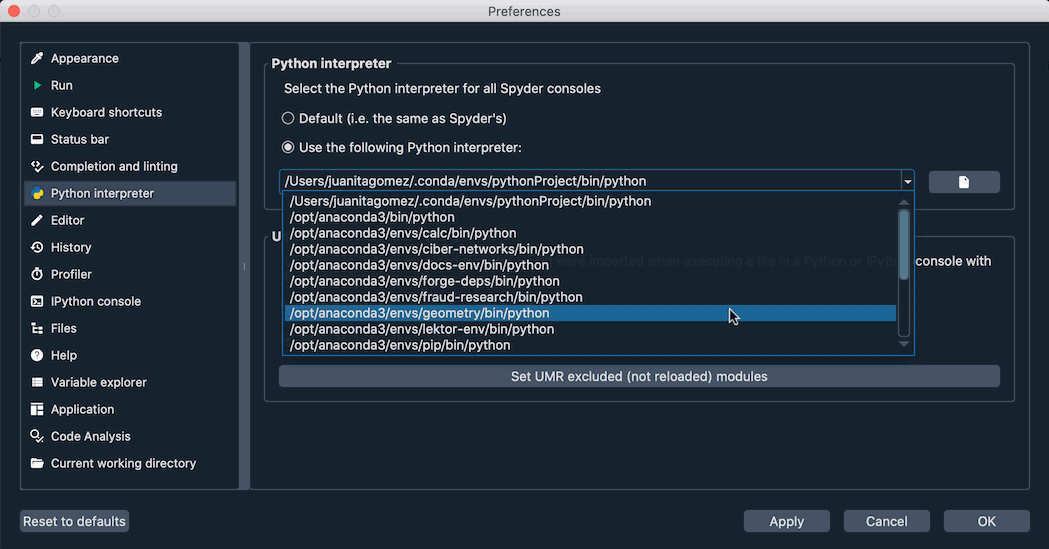
To work with an existing environment in Spyder, change the default Python interpreter for new IPython Consoles to point to this environment.
To do so, open the Python interpreter section of Spyder’s preferences (, or on macOS). Here, select the option Use the following Python interpreter, and use the dropdown below to select your preferred environment. If it’s not listed, see the note below.
Note
If you installed Miniconda (or another Conda-based distribution) to a non-default path, or are using a virtual environment managed by a tool other than pyenv, your environments likely won’t be listed.
Instead, use the text box or the Select file button to enter the path to the Python interpreter you want to use. You can find this path by activating the venv or Conda env you want to use in your terminal (Anaconda Prompt on Windows), and running the command:
python -c "import sys; print(sys.executable)"
Finally, click Restart kernel in the Consoles menu for this change to take effect.
If spyder-kernels is not already installed, the IPython Console will display instructions on how to install the right version.
Execute the given command in your terminal (the Anaconda Prompt on Windows) with the environment activated, and finally restart the kernel once more.
Q: How do I install Python packages to use within Spyder if I downloaded Spyder from the standalone installers?
Watch our video on using additional packages or follow the instructions below.
If you want to use other packages in Spyder that don’t come with our installer, you need to have your own Python distribution installed; we recommend Miniconda or another Conda-based option. For Spyder to recognize it automatically, you should use a Conda-based distribution with its default install path.
Create a new conda environment containing spyder-kernels and the packages that you want to use.
For example, if you want to use scikit-learn, open your terminal (or Anaconda prompt on Windows) and run the following command:
conda create -n my-env -c conda-forge spyder-kernels scikit-learn
Finally, connect Spyder to this my-env environment by changing Spyder’s default Python interpreter, following the instructions in the above answer.
Q: How do I reset Spyder’s preferences to the defaults?
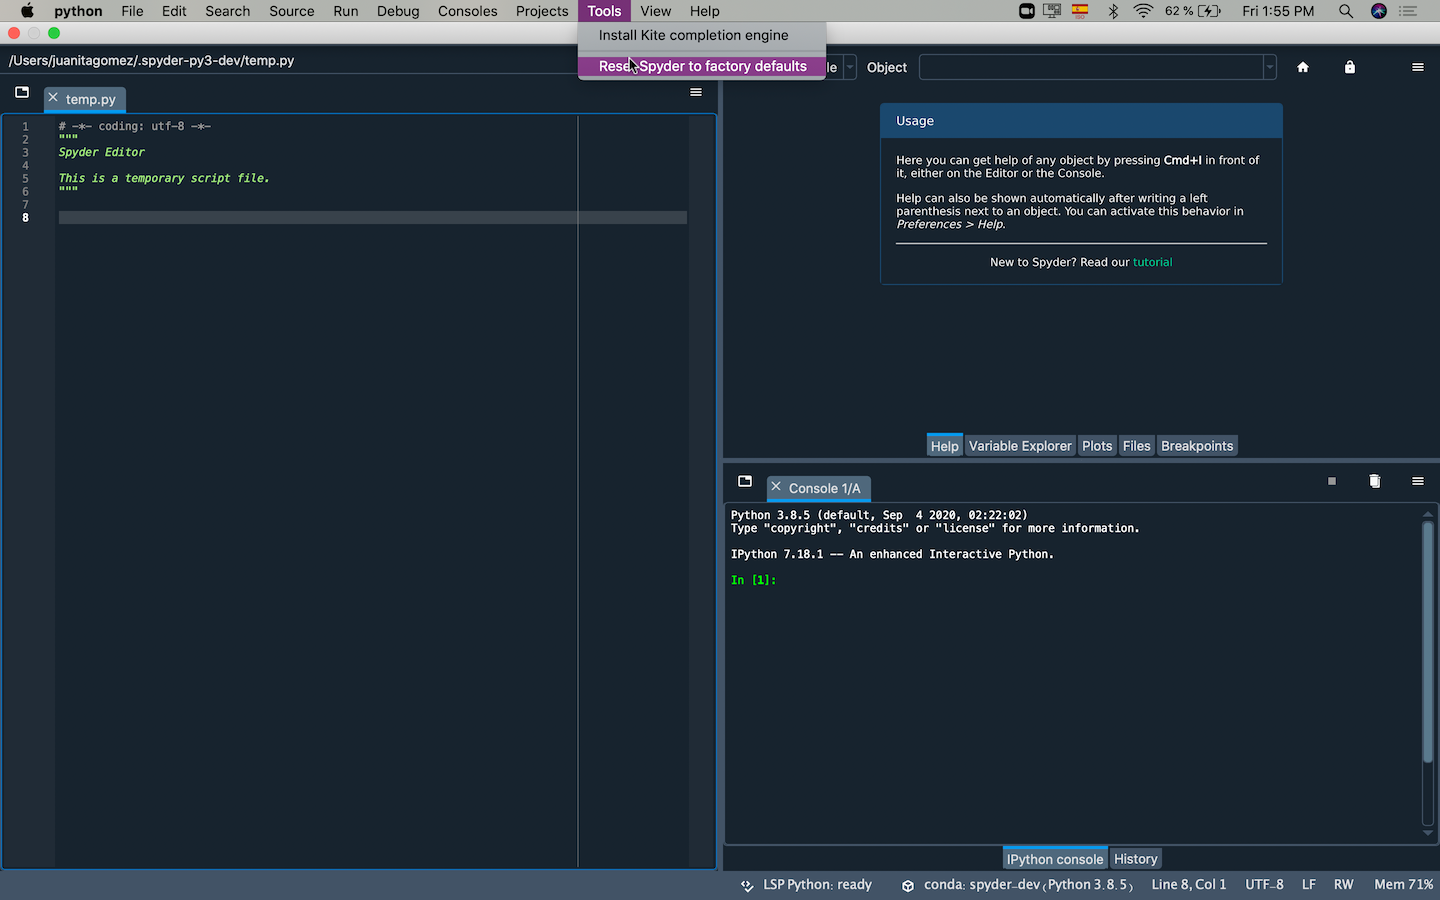
Either use the Reset Spyder to factory defaults under Tools in Spyder’s menu bar, the Reset Spyder settings Start menu shortcut (Windows), or run spyder --reset in your system terminal (Anaconda prompt on Windows).
Q: How do I change Spyder’s language?
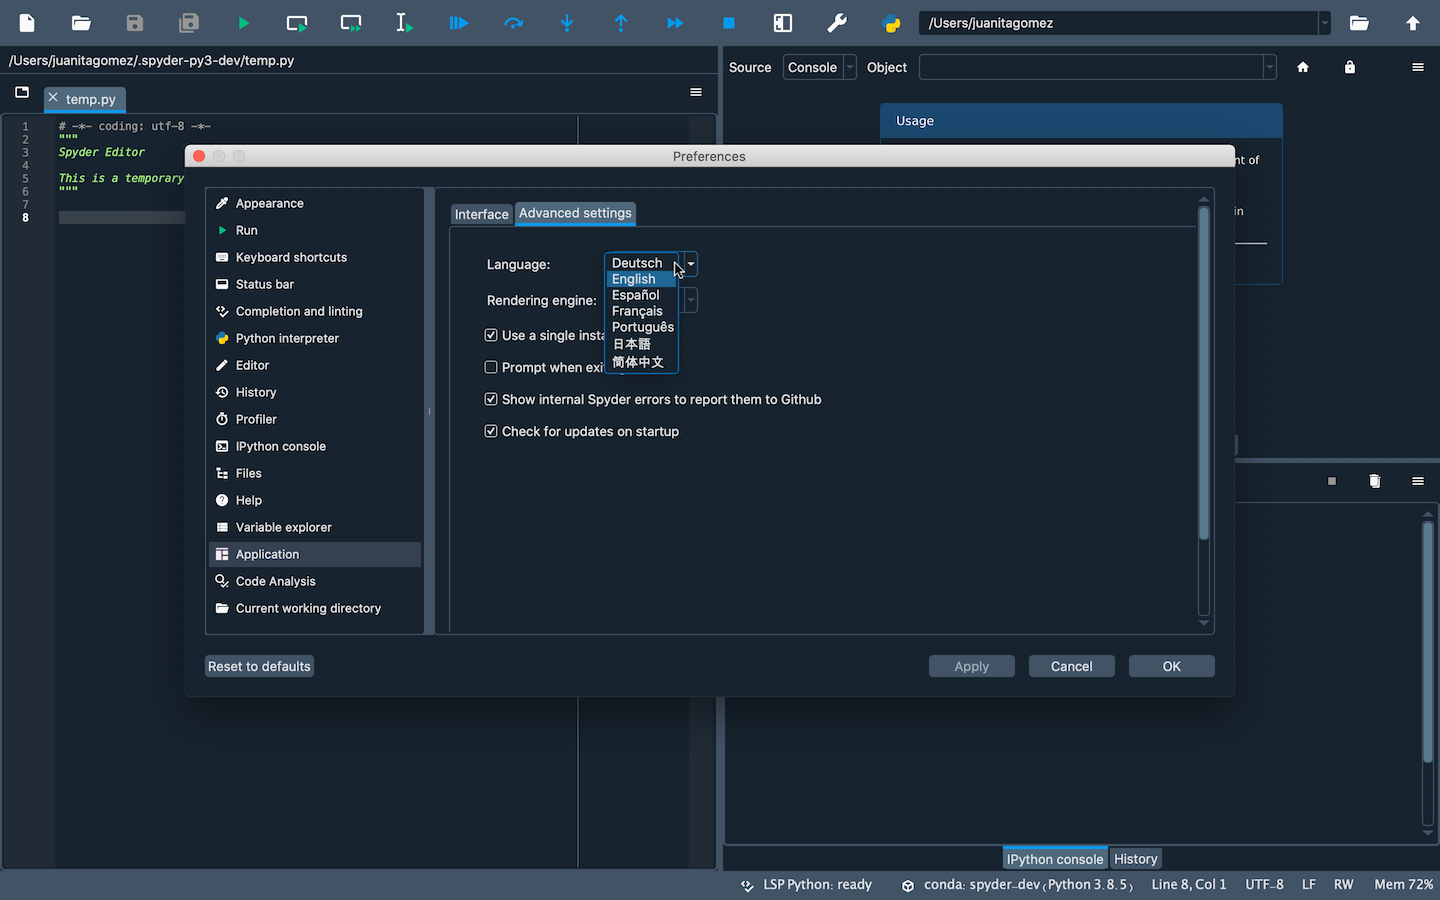
Under General in Spyder’s Preferences, go to the Advanced settings tab and select your language from the options displayed under Language.
Q: How do I use code cells in Spyder?
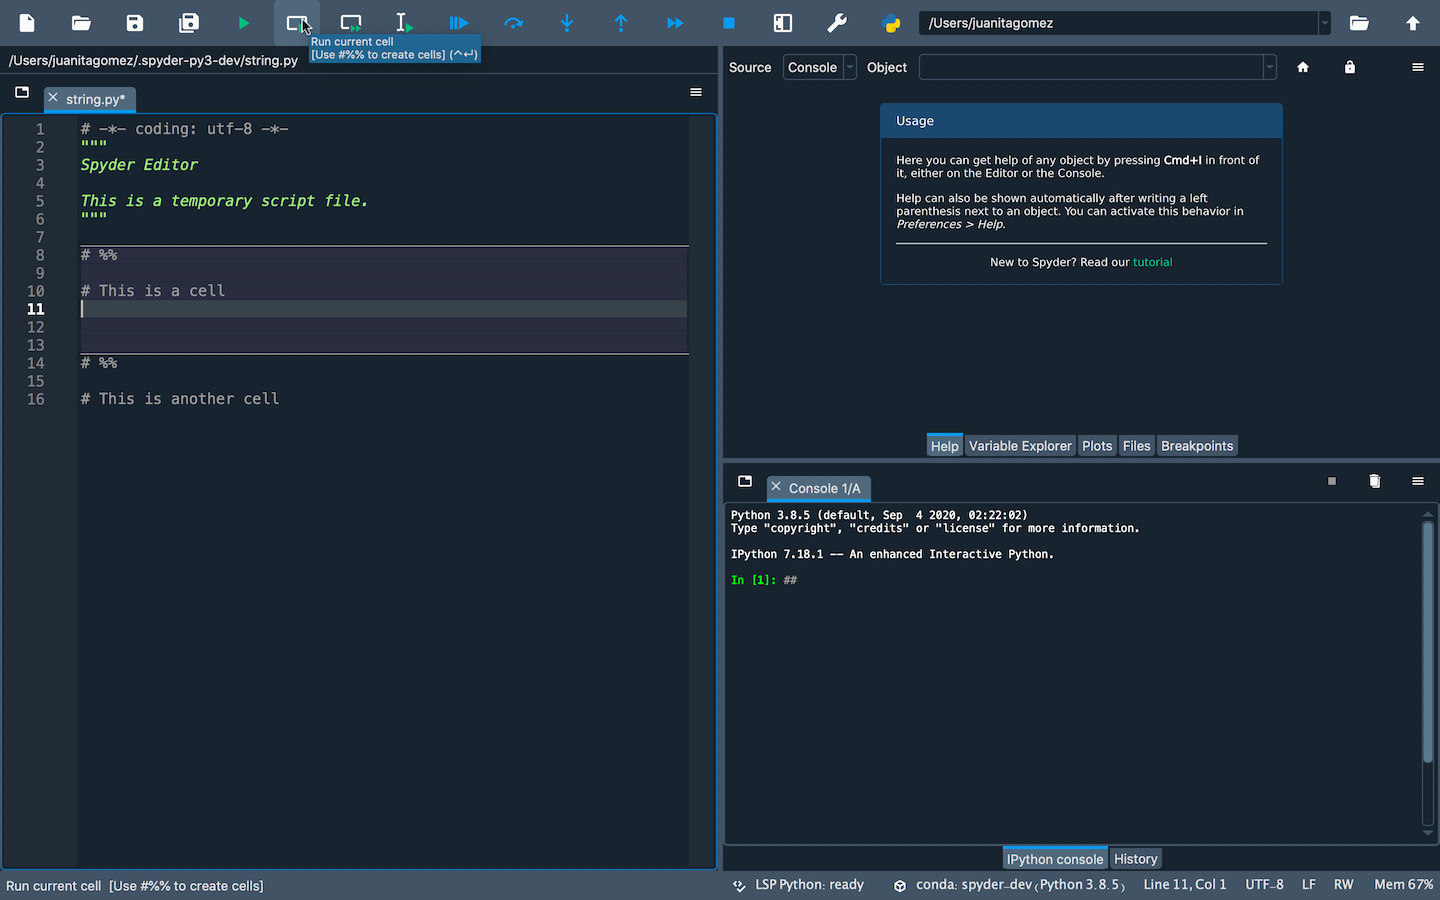
To create a cell in Spyder’s Editor, type #%% in your script.
Each #%% will make a new cell.
To run a cell, press Shift-Enter (while your cursor is focused on it) or use the Run current cell button in Spyder’s toolbar.
Q: How do I use plugins with Spyder (e.g. Spyder-Notebook, Spyder-Terminal, Spyder-Unittest)?
Spyder plugins are available in the conda-forge conda channel.
To install one, type on the command line (or Anaconda Prompt on Windows):
conda install -c conda-forge <PLUGIN>
Replace <PLUGIN> with the name of the plugin you want to use.
For more information on a specific plugin, go to the its repository:
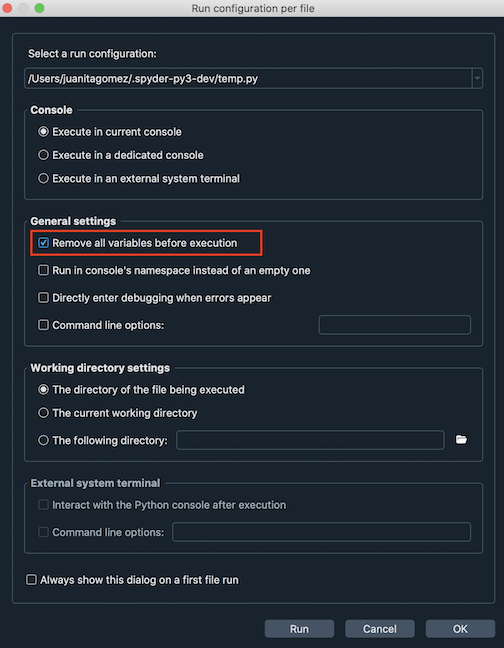
Q: How do I clear all variables before executing my code?
Check the option Remove all variables before execution in the Configuration per file… dialog under the Run menu.
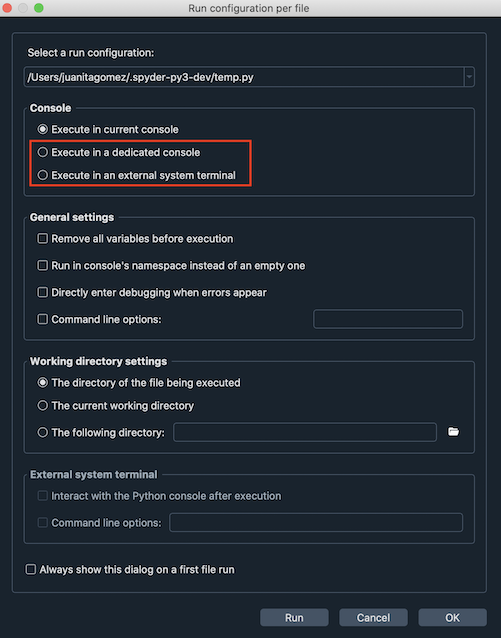
Q: How do I run my code in a dedicated console or an external system terminal?
Select the appropriate option in the Configuration per file… dialog under the Run menu.
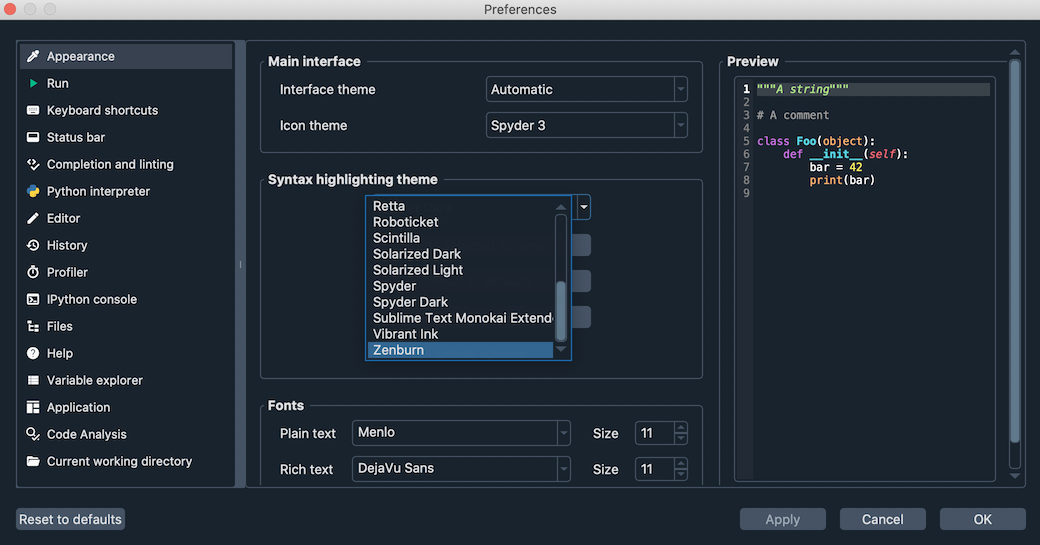
Q: How do I change the syntax highlighting theme in the Editor?
Go to Preferences and select the theme you want under Syntax highlighting theme in the Appearance section.
Troubleshooting#
Q: I’ve found a bug or issue with Spyder. What do I do?
You should first follow the steps in our troubleshooting guide. If you can’t solve your problem, open an issue by following the instructions in our Submit a Report section.
Q: I get an error in the IPython console running my code! Help!
First, make sure the error you are seeing is not a bug in your code. To confirm this, try running it in any standard Python interpreter. If the error still occurs, the problem is likely with your code and a site like Stack Overflow might be the best place to start. Otherwise, start at the Basic First Aid section of our troubleshooting guide.
Q: Code completion/help doesn’t work; what can I do?
If nothing is displayed in the calltip, hover hint or Help pane, make sure the object you are inspecting has a docstring, and try executing your code in the IPython Console to get help and completions there. If this doesn’t work, try restarting PyLS by right-clicking the LSP Python label item in the statusbar at the bottom of Spyder’s main window, and selecting the Restart Python Language Server option.
For more information, go to the Completion/help not working section in the Common Illnesses page of our troubleshooting guide.
Q: I get the message “An error occurred while starting the kernel”. How do I fix this?
First, make sure your version of Spyder-Kernels is compatible with that of Spyder. See the table in the Spyder-Kernels not installed/incompatible section of the troubleshooting guide to check.
To install the right version, type the following on the command line (or Anaconda Prompt on Windows)
conda install spyder-kernels=<VERSION>
For more information, go to the Errors starting the kernel section in the Common Illnesses page of our troubleshooting guide.
Q: Spyder doesn’t launch or is slow on macOS Big Sur. How can I get it working?
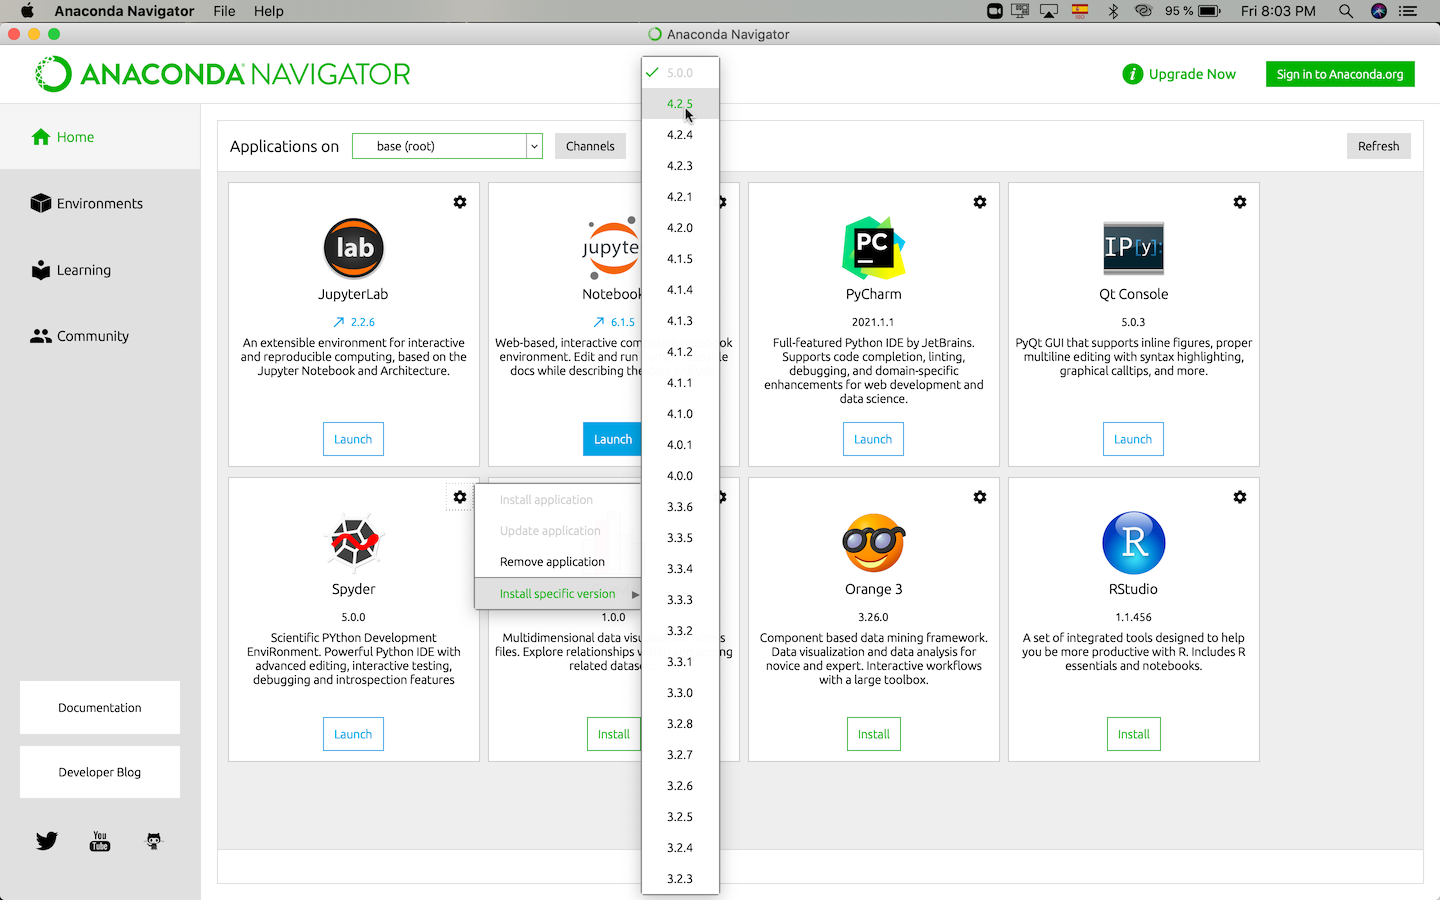
Spyder is in the final stages of being updated for full compatibility with macOS 11 Big Sur, which will be released by the end of 2020 as part of version 4.2.1. However, you can get it working right now with the workaround below. Make sure you have the Anaconda or Miniconda distribution installed, and run the following commands in the Terminal to install Spyder from Conda-Forge in a clean environment:
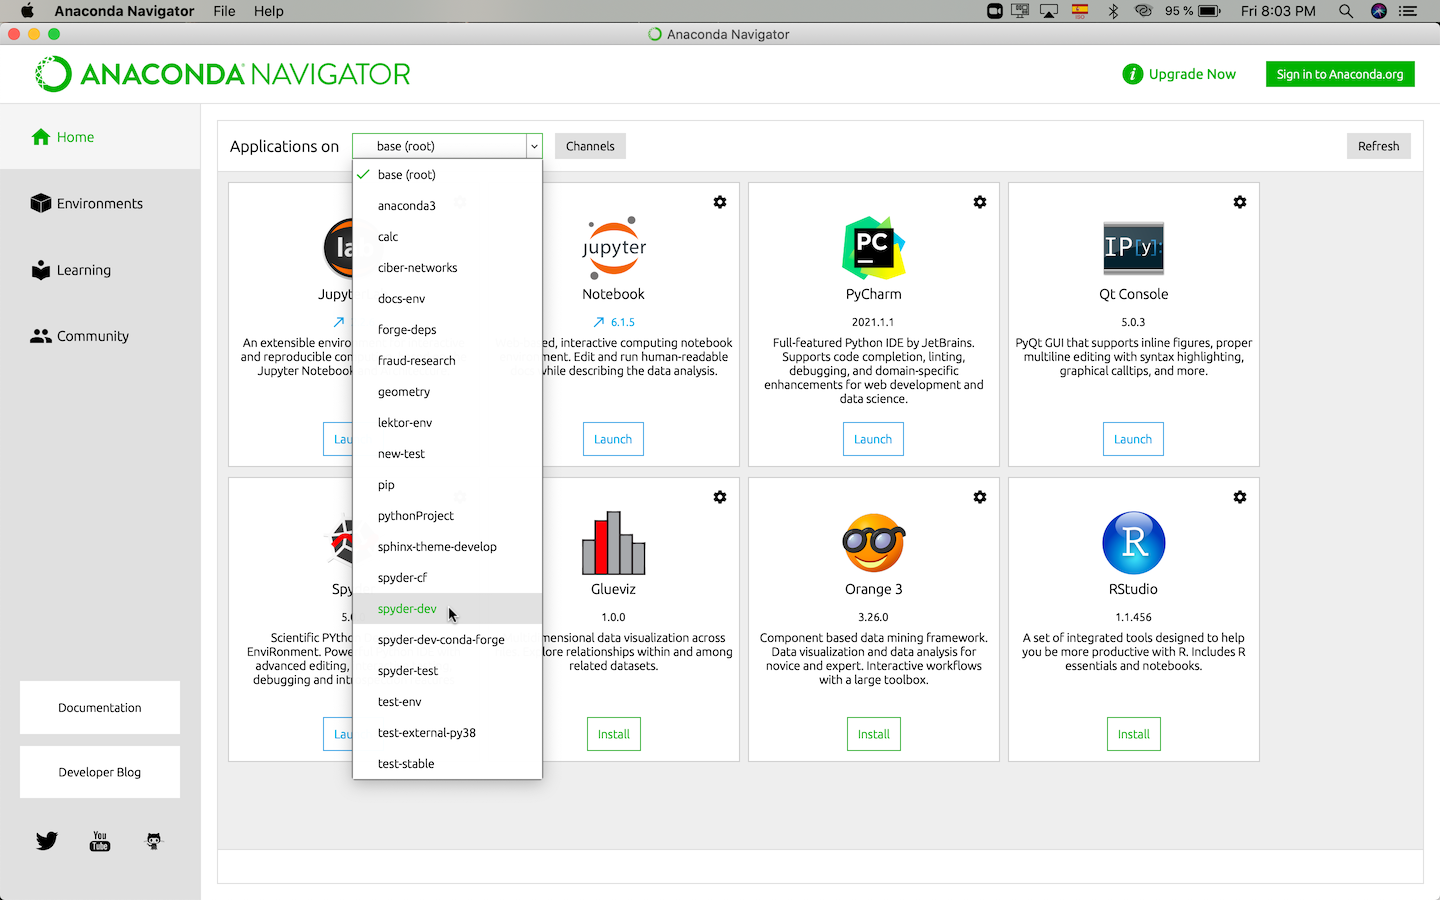
conda create -n spyder-dev python=3
conda activate spyder-dev
conda install -c conda-forge spyder
Then, whenever you want to start Spyder, run the following from the Terminal:
conda activate spyder-dev
export QT_MAC_WANTS_LAYER=1
spyder
About Spyder#
Q: What’s Spyder’s licensing situation? Is commercial use allowed?
Spyder is 100% free and open source; there is no paid version or prohibition on commercial use. It is developed by its international user community, and supported by its users through OpenCollective and by its generous sponsoring organizations, including Quansight and NumFOCUS. Our source code, standalone installers and most of our distribution methods (Pip/PyPI, Linux distros, MacPorts, WinPython, etc) can be freely redistributed, used and modified by anyone, for any purpose, including commercial use. For more details about the situation with Anaconda, see that question.
Q: What do the Anaconda licensing changes mean for Spyder?
If you use Spyder with the Anaconda distribution, they recently changed their Terms of Service to add restrictions on large (> 200 employee) for-profit companies using Anaconda on a large scale.
However, these terms only apply to the package infrastructure (the full Anaconda distribution and the defaults conda channel).
Instead, you can simply download the similar Miniforge distribution, which is 100% open source and identical to full Anaconda (aside from not bundling the Python packages installed by default in the Anaconda base environment, which we recommend you avoid using anyway given any problems here can break your whole installation).
Then, simply install the packages you need (including Spyder, if you aren’t using our recommended Standalone installers) with conda as you usually do.
Miniforge will automatically use the community-maintained Conda-Forge repository, which has a much wider variety of packages and is generally more up to date than the Anaconda equivalent, in addition to being free of any commercial restrictions.
For more, see our Install Guide.
